Perfect Cookie
Cut-Outs
|
|
 Mom
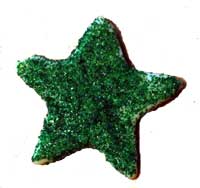
always insisted on an odd number of cookie varieties on the plate -
something about good luck, or perhaps a pleasing
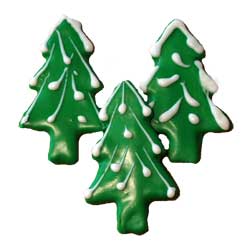
balance. Despite the perfectly cut blondies, mint
meringue puffs, pressed spritz, and homemade caramels, the stars on
the plate were the lavishly decorated cut-outs!
Creating these cookie masterpieces is easy and fun by
following a few good tips: Mom
always insisted on an odd number of cookie varieties on the plate -
something about good luck, or perhaps a pleasing
balance. Despite the perfectly cut blondies, mint
meringue puffs, pressed spritz, and homemade caramels, the stars on
the plate were the lavishly decorated cut-outs!
Creating these cookie masterpieces is easy and fun by
following a few good tips:
Tips for Perfect
Dough:
Cookie science requires the butter to encapsulate each sugar
granule; start the dough by creaming the butter and sugar together
to an even consistency without letting the butter to become too
warm. An electric mixer, hand or standing, will
heat the dough less than a food processor. Once
the dry ingredients are added to the butter mixture, work the dough
as little as possible to maintain tenderness.
Chill the dough in a flat disc prior to rolling to final
thickness.
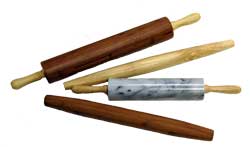
 Tips for Rolling: After allowing the
chilled discs to warm just slightly, roll to an even thickness with
a rolling pin. Rolling pin rings are
invaluable for achieving an even dough thickness,
critical to even baking. A great rolling pin
easily becomes an heirloom full of good memories.
Roll the dough to final thickness on a piece of parchment
paper to facilitate the next steps. Tips for Rolling: After allowing the
chilled discs to warm just slightly, roll to an even thickness with
a rolling pin. Rolling pin rings are
invaluable for achieving an even dough thickness,
critical to even baking. A great rolling pin
easily becomes an heirloom full of good memories.
Roll the dough to final thickness on a piece of parchment
paper to facilitate the next steps.
 Tips
for Cutting:
Live it up with all kinds of cookie cutter shapes - stars, Santas,
trees, reindeer, snowflakes, angels - we could go on and
on! Celebrate National Cookie Cutter Week - Dec 2
-8! Check out the cutter sets for 3-dimensional cookies!
A good cookie cutter can be made of any material, but
definitely should hold its shape in the hand and have a thin cutting
edge. With the rolled dough on parchment paper,
press the cookie cutters. Dip the cutters in
flour or powdered sugar to prevent sticking.
Remove the extra dough leaving the cookie
cut-outs. Transfer the parchment to a baking
sheet. This process eliminates any stretching or
distortion of the shapes. If the dough has
warmed, chill again before baking. Tips
for Cutting:
Live it up with all kinds of cookie cutter shapes - stars, Santas,
trees, reindeer, snowflakes, angels - we could go on and
on! Celebrate National Cookie Cutter Week - Dec 2
-8! Check out the cutter sets for 3-dimensional cookies!
A good cookie cutter can be made of any material, but
definitely should hold its shape in the hand and have a thin cutting
edge. With the rolled dough on parchment paper,
press the cookie cutters. Dip the cutters in
flour or powdered sugar to prevent sticking.
Remove the extra dough leaving the cookie
cut-outs. Transfer the parchment to a baking
sheet. This process eliminates any stretching or
distortion of the shapes. If the dough has
warmed, chill again before baking.
 Tips for Baking: Use baking sheets that
are light in color; dark-colored bakeware absorbs more heat and
transfers that excess heat to the food. A matte
finish on the baking sheet will prevent sticking more than a shiny,
smooth surface. A cookie sheet with at least one
side without a rim facilitates access by a spatula.
Serious bakers find that four baking sheets allow for a
continuous flow between the cutting, chilling, baking, and cooling
steps. Tips for Baking: Use baking sheets that
are light in color; dark-colored bakeware absorbs more heat and
transfers that excess heat to the food. A matte
finish on the baking sheet will prevent sticking more than a shiny,
smooth surface. A cookie sheet with at least one
side without a rim facilitates access by a spatula.
Serious bakers find that four baking sheets allow for a
continuous flow between the cutting, chilling, baking, and cooling
steps.
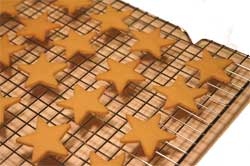 Tips for Cooling: Perfectly baked rolled
cookies will spring back when gently touched with a
fingertip. Place the cookie sheet on a cooling
rack. Allow the cookies to set and finish
evaporating any excess moisture for 1 minute.
Removed too quickly, they'll break.
Removed too late, the bottoms congeal and stick.
Use a second timer to time the all-important cooling
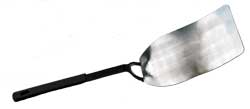
step. A very thin, slightly flexible spatula with
a wide width is perfect for secure transfers from the cookie
sheet. We prefer cooling racks that have a grid,
(instead of just parallel wires), for the support they give to the
edges of the cookies. Tips for Cooling: Perfectly baked rolled
cookies will spring back when gently touched with a
fingertip. Place the cookie sheet on a cooling
rack. Allow the cookies to set and finish
evaporating any excess moisture for 1 minute.
Removed too quickly, they'll break.
Removed too late, the bottoms congeal and stick.
Use a second timer to time the all-important cooling
step. A very thin, slightly flexible spatula with
a wide width is perfect for secure transfers from the cookie
sheet. We prefer cooling racks that have a grid,
(instead of just parallel wires), for the support they give to the
edges of the cookies.
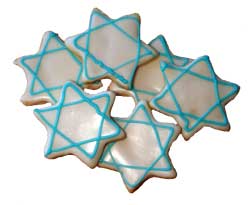 Tips for Decorating: Call upon all your
patience and let the cookies cool completely before
decorating. Place the cooling rack on top of the
used parchment paper and baking sheet for easy clean-up after
frosting. Royal icing, made with powdered egg
whites, produces a great frosting that spreads and pipes well,
drying quickly to a durable surface. Allow one
color to dry slightly before adding the next to keep designs
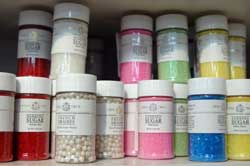
distinct. Indulge your creations with differently
colored sanding sugars, sprinkles, dragees, and other finishing
touches! Tips for Decorating: Call upon all your
patience and let the cookies cool completely before
decorating. Place the cooling rack on top of the
used parchment paper and baking sheet for easy clean-up after
frosting. Royal icing, made with powdered egg
whites, produces a great frosting that spreads and pipes well,
drying quickly to a durable surface. Allow one
color to dry slightly before adding the next to keep designs
distinct. Indulge your creations with differently
colored sanding sugars, sprinkles, dragees, and other finishing
touches!
|
| Sumptuous
Sables |
|
It's difficult to
focus on just a couple types of cookies in the vast realm of
choices, but after frosted cut-outs, one of our favorites is the
sablé. 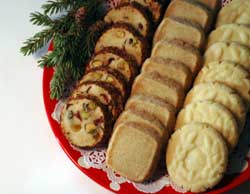 This type of cookie is based on a dough of
butter, sugar, flour and salt. No eggs, no baking
powder. Variations to the basic dough, (2 parts
butter, 4 parts flour, 1 part sugar, and a pinch of salt), provide
endless melt-in-the-mouth pleasure! Known in some
regions as shortbread, galettes, palets, sand tarts, or butter
cookies, in France, the term is sablé -
smooth sounding and just as smooth tasting! This type of cookie is based on a dough of
butter, sugar, flour and salt. No eggs, no baking
powder. Variations to the basic dough, (2 parts
butter, 4 parts flour, 1 part sugar, and a pinch of salt), provide
endless melt-in-the-mouth pleasure! Known in some
regions as shortbread, galettes, palets, sand tarts, or butter
cookies, in France, the term is sablé -
smooth sounding and just as smooth tasting!
Simple - Sablés
produce great results with a minimum of ingredients and a minimum of
fuss. Similar to rolled cookies, the butter and
sugar are combined thoroughly, but avoiding a light, or fluffy
outcome. Dry ingredients are added all at once
and mixed just until incorporated. Chunky
"mix-ins," are folded in by hand.
 Switchable - The basic dough is endlessly
accommodating of flavorings, (vanilla, almond, or even butter-rum),
spices (cinnamon, nutmeg, cardamom), and chunks (chocolate chips,
nuts, dried fruits). Additions shift the
character of each recipe while retaining the basic buttery, sweet
taste and crunch. Sandwich two sablé
cookies with jam or ganache and double the pleasure. Switchable - The basic dough is endlessly
accommodating of flavorings, (vanilla, almond, or even butter-rum),
spices (cinnamon, nutmeg, cardamom), and chunks (chocolate chips,
nuts, dried fruits). Additions shift the
character of each recipe while retaining the basic buttery, sweet
taste and crunch. Sandwich two sablé
cookies with jam or ganache and double the pleasure.
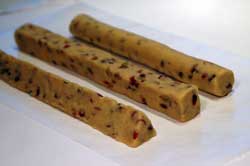
Shapely - Sablés lend
themselves to efficient mass-production techniques.
The dough is rolled into round, square, or even triangular
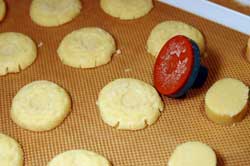
logs. Some of us like to roll the logs in sanding
sugar for a touch of glitter. A hand-held cookie
press can imprint a unique design.
Systematic - After chilling, the logs are cut into
slices and readied for baking in a snap. The
defined shapes fit neatly and efficiently in staggered rows on a
baking sheet. It's easy to bake 20 cookies on one
sheet. At 12 minutes per batch, 100 cookies can
be baked in an hour!
 Storable - Sablés are
do-ahead friendly! The dough can be mixed ahead
of time and frozen until needed. Straight from
the freezer the dough may be sliced after just a few minutes of room
air. In fact, very cold dough is easier to slice
than warmer dough. After baking, sablés
store and stack well. Storable - Sablés are
do-ahead friendly! The dough can be mixed ahead
of time and frozen until needed. Straight from
the freezer the dough may be sliced after just a few minutes of room
air. In fact, very cold dough is easier to slice
than warmer dough. After baking, sablés
store and stack well.
Satisfying - When we crave just a little bit of sweet
with a cup of coffee, a sablé fills
the need completely. Need we say
more? Sample the sablé
recipe below featuring a double chocolate
variation. |
Gifting From
and For the Kitchen
|
|
 We all need to eat. Based
on that, it's difficult to go wrong with a gift from or for the
kitchen for everyone on your list! We all need to eat. Based
on that, it's difficult to go wrong with a gift from or for the
kitchen for everyone on your list!
Gifts of
Experience - Ignite a
passion with well-chosen components:
Cookie Baking Kit - a first baker's kit of cookie sheets,
rolling pin, cookie cutters, and colorful decorations wrapped in a
chef's apron.
Pasta
Primo - nothing beats
homemade pasta; inspire someone with the art and skills of homemade
pasta with a pasta maker, drying racks, ravioli cutters, and a great
bottle of wine.
Moroccan
Madness - an All-Clad
tagine containing a North African cookbook and two plane tickets to
Casa Blanca as bookmarkers.
Simmer Softly - an updated slow-cooker with Not your
Mother's Slow Cooker Cookbook.
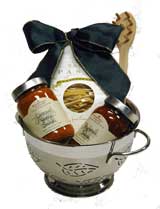
For Exquisite Tastes! -
Choose from an array of exquisite olive oils expressly for finishing
great dishes. Our selection includes specialties from the
Sicilian and Tuscan regions of Italy, Portugal, New Zealand, and
Australian.
Great
Finishes! - You won't look at mustard the same way again once
you've had one of our French mustards: Black Currant (Teresa's
favorite), Tarragon, Basil, Dijon, Truffle, and Fig. These go
well with Fleur de Sel in completing a dish or sandwich.
Include a beautiful spreader or little wooden salt spoon tied in the
bow!
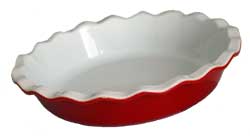 Pecan Pie Kit - Exquisite
pecans harvested in the San Sabre River Valley, TX paired with an
Emile Henry dish and pie server. Help devour! Pecan Pie Kit - Exquisite
pecans harvested in the San Sabre River Valley, TX paired with an
Emile Henry dish and pie server. Help devour!
Bread-making Set-up - King
Arthur Cookbook with a Mason Cash Bread Bowl, white whole wheat
flour, spelt or potato flour, and King Arthur yeast. Offer a few
lessons and your recipient will never go hungry!
Gifts from your
Hands - Share the bounty of
your cooking passion:
Jar
of Homemade Candies -
caramels, toffee, and peanut brittle in a reusable
canister.
Box of your
Holiday Cookies - cut-outs,
sables, drops, bars - your favorites shared.
 Jams and Butters - apple butter, grape jelly, nut butters
and something to spread them on. Jams and Butters - apple butter, grape jelly, nut butters
and something to spread them on.
Quick Bread in Paper Loaf
Pans - cranberry orange,
lemon poppy seed, or even a fruitcake (jokes
aside).
Soup Mix in Soup
Bowls - the gift of inner
warmth with "just add water" ease.
Gifts for the
Entertainer - Support those
who love to entertain and you'll continue to receive
invitations!
Bountiful
Buffet - Add to the buffet
repertoire with a chafing dish, or an induction heating plate, or a
decorative centerpiece.
Barkeep - Improve bar equipment with updated
options in shakers, ice buckets, and glassware.
Serviceware - Facilitate presentations with larger
pieces from Le Creuset or Emile Henry.
Wine Lover - Match the glass with the wine with
customized stemware.
Tossa Long Drink glasses
with Caspari paper napkins, a cheeseboard, and cheese
markers.
 Gifts for the Learner - Foster skills in others and you'll never
go hungry: Gifts for the Learner - Foster skills in others and you'll never
go hungry:
Favorite
Cookbook - insert sticky
notes on your favorite recipes and give them a head
start.
Cooking Class
Certificate - package a
gift certificate to one of our cooking classes along with a gadget
that echoes the class theme.
Your Favorite Recipes in a
Notebook - pass on
traditions with your classics recorded.
Gifts for the
Hungry - For the "Don't
Make Me Cook," just "Feed Me" types:
Paella Now! - Bomba rice
(the best for paella), piquillo peppers, smoked paprika, saffron,
and a paella pan -- just add chorizo or chicken!
Breakfast in Bed - new coffeemaker, beans, jam and muffin
mix; Make a promise to prepare and deliver!
Ice Cream Anytime! - Equip
your favorite person with a Cuisinart ice cream maker, Fran's
Raspberry Sauce, and a Van Vacter ice cream knife. Serious
affection implied with this gift
trio!
Pantry Specialties - delicious sauces, dips, spreads and
toppings -- simple and accessible for any cook and any
occasion. |
Plan Ahead
Tips
|
 Tip #1: Outsource some of your
cookie baking with an informal cookie swap.
Gather 3 or 4 like minds and assign each to make 6-8 dozen of
their favorite cookie by a specific date.
Coordinate the agenda to maximize the variety, flavors,
color, and shape. Set a time for a cup of coffee
to make the exchange and enjoy each other's company, knowing that
your cookie baking tasks are under control. Tip #1: Outsource some of your
cookie baking with an informal cookie swap.
Gather 3 or 4 like minds and assign each to make 6-8 dozen of
their favorite cookie by a specific date.
Coordinate the agenda to maximize the variety, flavors,
color, and shape. Set a time for a cup of coffee
to make the exchange and enjoy each other's company, knowing that
your cookie baking tasks are under control.
 Tip #2: Host a cookie decorating
party for kids of all ages! Cut out and bake your
favorite sugar cookies and/or gingerbread cookies.
Mix the frosting in a variety of colors.
Assemble toothpicks, tweezers, piping tips, and paintbrushes
for applying frosting and embellishments. Equip
each participant with a large dinner plate to use as a
workstation. Set the mood with your favorite
holiday
music! Tip #2: Host a cookie decorating
party for kids of all ages! Cut out and bake your
favorite sugar cookies and/or gingerbread cookies.
Mix the frosting in a variety of colors.
Assemble toothpicks, tweezers, piping tips, and paintbrushes
for applying frosting and embellishments. Equip
each participant with a large dinner plate to use as a
workstation. Set the mood with your favorite
holiday
music!
|
Q & A
|
|

Q: What is a
Silpat? How should I care for
it?
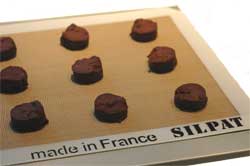
A: Silpat is the trade name
for one of the original silicone baking products.
Silpat, and their look-alikes, are made from a weave of
fiberglass encased in food grade silicone. These
baking mats provide an effective non-stick surface perfect for
cookie making. Available in a variety of shapes
and sizes, 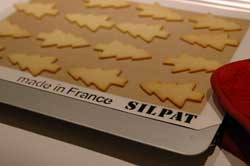 silicone
baking mats are reusable and easily cared for with a damp cloth, or
in slightly soapy water. Air dry and store
flat. Do not cut on a silicone baking mat or
otherwise tear the silicone covering. silicone
baking mats are reusable and easily cared for with a damp cloth, or
in slightly soapy water. Air dry and store
flat. Do not cut on a silicone baking mat or
otherwise tear the silicone covering.
Q: What is parchment paper?
Why and how does it work?
A:
Parchment paper, (bleached white, or an
unbleached brown), is paper treated with sulfuric acid sealing it
from grease and moisture, then coated with silicone creating a
non-stick surface. Parchment paper is great for
cookie baking as well as in rolling dough. In
cookie baking, the same piece of parchment may be used for baking
several batches. It's magic!
 Q: Why do my cookies spread
into globs instead of well-defined cut-outs? Q: Why do my cookies spread
into globs instead of well-defined cut-outs?
A:
There may be several causes behind this
dilemma: (1) Too much sugar in the recipe, (2)
Dough placed on a warm cookie
sheet, (3) Dough not chilled thoroughly, or (4) Too low of an oven
temperature.
Q:
When I
bake and store my cookies, they seem to get soft.
How can I revive them?
A:
Heat the oven to 425 degrees, and "bake"
unfrosted cookies for 4-5 minutes. This will
evaporate any excess moisture that may have accumulated and simulate
freshly baked cookies. Cool slightly and
serve. |
| Recipe |
|
Dorie Greenspan
shares this fantastic recipe in her cookbook, Baking, From My Home to Yours
(a great gift for anyone, including you!). We
think Santa will be quite pleased with these cookies!
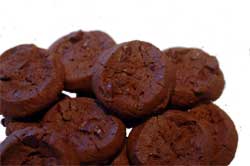
Ms. Greenspan
writes, "These butter-rich, sandy-textured slice-and-bake cookies
are members of the sablé
family. But, unlike classic sablés,
they are midnight dark - there's cocoa in the dough - and packed
with chunks of hand-chopped bittersweet chocolate.
Perhaps most memorably, they're salty. Not
just a little salty, but remarkably and sensationally
salty. It's the salt . . . fleur de sel, a moist,
off-white sea salt - that surprises, delights and makes the
chocolate flavors in the cookies seem preternaturally profound."
She continues,
"When I included these in Paris Sweets, they were
called Korova Cookies and they instantly won fans, among them my
neighbor Richard Gold, who gave them their new name.
Richard is convinced that a daily dose of Pierre's cookies is
all that is needed to ensure planetary peace and
happiness."
(Click here for
a printable version the recipe
in PDF format).
World Peace
Cookies
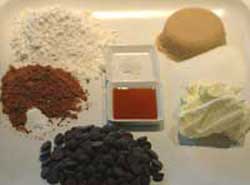 1-1/4 cup all-purpose flour 1-1/4 cup all-purpose flour
1/3 cup
unsweetened cocoa
1/2 teaspoon baking soda
1 stick plus 3
Tablespoons (11 Tablespoons) unsalted butter, at room
temperature
2/3 cup (packed) light brown sugar
1/4 cup
sugar
1/2 teaspoon fleur de sel, or 1/4 teaspoon fine sea
salt
1 teaspoon pure vanilla extract
5 ounces bittersweet
chocolate, chopped into chips, or a generous 3/4 cup of store-bought
mini-chips
Mixing:
(1) Sift the flour, cocoa
and baking soda together.
 (2) Working with a stand
mixer, preferably fitted with a paddle attachment, or with a hand
mixer in a large bowl, beat the butter on medium speed until soft
and creamy. (2) Working with a stand
mixer, preferably fitted with a paddle attachment, or with a hand
mixer in a large bowl, beat the butter on medium speed until soft
and creamy.
(3)
Add both sugars, the salt and vanilla extract and beat for 2
minutes more.
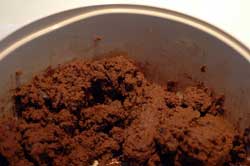
(4)
Turn off the mixer. Pour in the dry
ingredients; drape a kitchen towel over the stand mixer to protect
yourself and your kitchen from flying flour and pulse the mixer at
low speed about 5 times, a second or two each time.
Take a peek - if there is still a lot of flour on the surface
of the dough, pulse a couple of times more; if not, remove the
towel. Continuing at low speed, mix for about 30
seconds more, just until the flour disappears into the dough - for
the best texture, work the dough as little as possible once the
flour is added, and don't be concerned if the dough looks a little
crumbly.
 (5) Toss in the chocolate
pieces and mix only to incorporate. (5) Toss in the chocolate
pieces and mix only to incorporate.
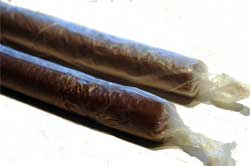
(6)
Turn the dough out onto a work surface, gather it together
and divide it in half. Working with one half at a
time, shape the dough into logs that are 1-1/2 inches in
diameter. Wrap the logs in plastic wrap and
refrigerate them for at least 3 hours. (The dough
can be refrigerated for up to 3 days or frozen for up to 2
months. If you've frozen the dough, you needn't
defrost it before baking - just slice the logs into cookies and bake
the cookies 1 minute longer).
Getting Ready to
Bake:
(7)
Center a rack in the oven and preheat the oven to 325 degrees
F. Line two baking sheets with parchment or
silicone mats.
 (8) Using a sharp thin
knife, slice the logs into rounds that are 1/2 inch
thick. (The rounds are likely to crack as you're
cutting them - don't be concerned, just squeeze the bits back onto
each cookie). Arrange the rounds on the baking
sheets, leaving about 1 inch between them. (8) Using a sharp thin
knife, slice the logs into rounds that are 1/2 inch
thick. (The rounds are likely to crack as you're
cutting them - don't be concerned, just squeeze the bits back onto
each cookie). Arrange the rounds on the baking
sheets, leaving about 1 inch between them.
(9)
Bake the cookies one sheet at a time for 12 minutes - they
won't look done, nor will they be firm, but that's just the way they
should be. Transfer the baking sheet to a cooling
rack and let the cookies rest until they are only just warm, at
which point you can serve them or let them reach room
temperature.
Serving:
 (10) The cookies can be
eaten when they are warm or at room temperature - I prefer them at
room temperature when the textural difference between the crumbly
cookie and the chocolate bits is greatest - and are best suited to
cold milk or hot coffee. (10) The cookies can be
eaten when they are warm or at room temperature - I prefer them at
room temperature when the textural difference between the crumbly
cookie and the chocolate bits is greatest - and are best suited to
cold milk or hot coffee.
Storing:
(11)
Packed airtight, the cookies will keep at room temperatures
for up to 3 days; they can be frozen for up to 2 months.
Makes about 36 cookies.
Recipes from
Baking, From my Home to Yours by Dorie Greenspan.
Copyright (c) 2006 by Dorie Greenspan. Used by permission of
Houghton Mifflin Company. All rights
reserved. | |