|
| Crusty White, Peasant Style Pot Bread
|
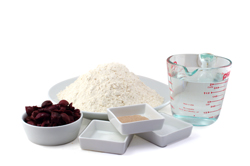
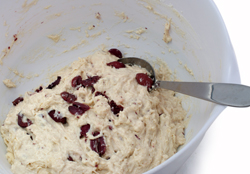
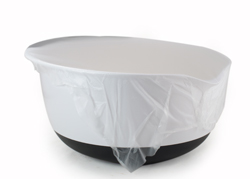
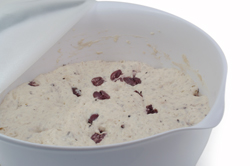
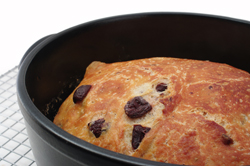
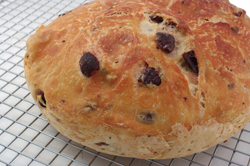
Recipes excerpted from Kneadlessly Simple, Fabulous, Fuss-Free, No-Knead Breads by Nancy Baggett. Copyright 2009. Published by John Wiley & Sons, Inc, Hoboken, NJ. Reprinted with permission of the publisher. All rights reserved. Click here for a printable version of the recipe. Crusty White, Peasant Style Pot Bread Pot boules – round, peasant-style breads simply popped in a sturdy, lidded pot and baked – are about the easiest loaves possible, but among the most gratifying. They puff up well, brown beautifully, and always come out crusty, due to the moisture trapped inside the pot during the first few minutes in the oven. (In fact, the pot actually serves as a mini-oven). As an added bonus, the loaves need no hand-shaping because the dough just conforms to the container shape as it expands. Should you ever want a change of pace from the basic loaf, it’s an easy matter to add a few accents for a rather different effect. See the rosemary-black olive variation at the end of the recipe. Yield: 1 large loaf, 12 to 14 slices. 4 cups (20 ounces) unbleached all-purpose white flour or unbleached white bread flour, plus more as needed First Rise: In a large bowl, thoroughly stir together the flour, sugar, salt, and yeast. Vigorously stir the water into the bowl, scraping down the sides and mixing until the ingredients are thoroughly blended. If the mixture is too dry to incorporate all the flour, a bit at a time, stir in just enough more water to blend the ingredients; don’t over-moisten, as the dough should be very stiff. If necessary, stir in enough more flour to yield a hard-to-stir dough. Brush or spray the top with oil. Cover the bowl with plastic wrap. If desired, for best flavor or for convenience, you can refrigerate the dough for 3 to 10 hours. Then let rise at a cool room temperature for 18 to 24 hours. If convenient, vigorously stir the dough once about halfway through the rise. Second Rise: Using an oiled rubber spatula, gently lift and fold the dough in towards the center all the way around until mostly deflated; don’t stir. Brush or spray the surface with oil. Re-cover with nonstick spray–coated plastic wrap. Let Rise Using Any of These Methods: For a 1-1/2 to 2-1/2 hour regular rise, let stand at a warm room temperature; for a 1- to 2-hour accelerated rise, let stand in a turned-off microwave along with 1 cup of boiling-hot water; or for an extended rise, refrigerate, covered, for 4 to 24 hours, then set out at room temperature. Continue the rise until the dough doubles from the deflated size; remove the plastic if the dough nears it. Baking Preliminaries: 20 minutes before baking time, put a rack in the lower third of the oven; preheat to 450°F. Heat a 3-1/2- to 4-quart (or larger) heavy metal pot in the oven until sizzling hot (check with a few drops of water), then remove it, using heavy mitts. Taking care not to deflate the dough (or burn yourself), loosen it from the bowl sides with an oiled rubber spatula and gently invert it into the pot. Don’t worry if it is lopsided and ragged-looking; it will even out during baking. Generously spritz or brush the top with water. Immediately top with the lid. Shake the pot back and forth to center the dough. Baking: Reduce the heat to 425°F. Bake on the lower rack for 55 minutes. Remove the lid. Bake for 15 to 20 minutes longer, or until the top is well browned and a skewer inserted in the thickest part comes out with just a few crumbs on the tip (Or until the center registers 209° to 212°F on an instant-read thermometer). When it seems done, bake for 5 minutes longer to ensure the center is baked through. Cool in the pan on a wire rack for 10 to 15 minutes. Remove the loaf to the rack and cool thoroughly. Serving and Storing: Cut or tear the loaf into portions; it tastes great warm but will cut much better when cool. Cool completely before storing. To maintain the crisp crust, store draped with a clean tea towel or in a heavy paper bag. Or store airtight in a plastic bag or wrapped in foil: The crust will soften, but can be crisped by heating the loaf, uncovered, in a 400°F oven for a few minutes. The bread will keep at room temperature for 3 days, and may be frozen, airtight, for up to 2 months. Variation: Crusty Rosemary and Olive Pot Bread – Stir 1 cup pitted, coarsely chopped black Kalamata Olives (well drained) and 3 tablespoons finely chopped fresh (not dried) rosemary needles (discard the stems) into the dough along with the water. Proceed exactly as directed in the original recipe. |
|
Beyond Pots and Pans | 4343 Pacific Avenue - University Square| Stockton | CA | 95207 | (209) 952-1966| Copyright 2009 - Acorn Advisors |