Tomboy Cake
Makes one 6-inch layer cake
Click here for a printable version of the recipe.
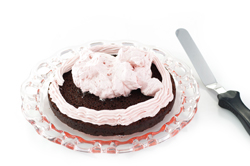
This cake was on it way to becoming a conventionally frosted layer cake when I noticed how unexpectedly voluptuous the bare sides looked with the frosting poking out between the layers. This cake has a gamine quality, a little rough around the edges – a bit of a tomboy with a little rose on top.
The expression "tomboy" has become part of the Miette vocabulary for a particular decorating style; any cake and frosting combination can become a Tomboy. The Double Chocolate Cake is the perfect candidate because its layers are so moist that they do not dry out even when exposed to the air. You'll notice a lot of attention to crumb control in this recipe; to achieve the finished look and keep the buttercream pristine, you need to guard against every fleck.
I especially like the Tomboy's proportion of frosting to cake; just a bit of each per bite, and never too much frosting. Key to the look of this cake is the star tip, used to pipe the frosting borders that give the frosting its slightly frilly edge.
Ingredients
1 Double Chocolate Cake (below)
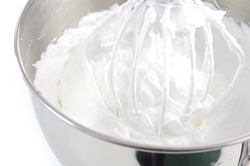
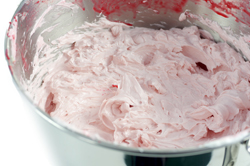
About 3 cups Raspberry Buttercream (below) or flavor of your choice
1 icing rose and small green leaf (optional)
Preparation
1. Make the Double Chocolate Cake as directed, using a regular cake pan, and make sure it is cool inside and out. (If frozen, let thaw in the refrigerator, 3 to 4 hours. If time demands, you can thaw on the countertop, 1 to 2 hours, but be careful not to let it sit too long before you begin working with it. This cake needs to be scrupulously crumb free, so make sure it is still cold when you begin to work).
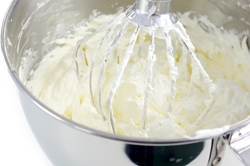
2. Clear a space in the refrigerator large enough for the cake on a cake board. If you made the buttercream previously and it has been refrigerated, follow the instructions to reheat and remix the frosting.
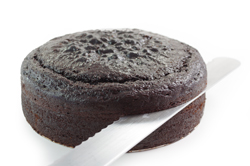
3. Set a revolving cake stand on a clean, dry work surface and place the cake, top-side up, on the stand. Using a serrated knife and holding the blade perfectly horizontal, cut the cake into three equal layers. While you saw gently with the knife, use your other hand to rotate the stand gradually and bring the cake toward you. Get eye level to the cake as needed to make sure you are holding the knife exactly level. (You do not need to level the top of the cake).
4. Arrange all three cake layers on the work surface. Using your hands, tap off and brush away excess crumbs. Turn the original bottom layer flat, dark-side, or pan-side down; reserve this to be the bottom layer of the assembled cake. (This is the reverse of the usual method of using the flat side for the top of a finished cake, but here the smooth edges from the cake pan give a nice finished look to the unfrosted base of the Tomboy). Tap any crumbs off the cake stand as well, and brush the work surface clean.
5. Place a nonslip pad or damp paper towel on the cake stand to prevent slipping and center a cake board on top. Take up the reserved bottom of the cake and center it on the board, first double-checking it for crumbs and brushing any off or pressing them into the sides.
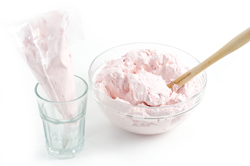
6. Fit a pastry bag with a medium (1/2- or 5/8-inch) star tip and fill about halfway with the buttercream. Pull up the cuff and twist it to seal and tighten the frosting down into the cone. Purge the bag of air bubbles by squeezing the bag until there is a burst of air and frosting sputters out of the bag. Keep the bag tightly twisted so that the frosting doesn't come back up on your hands. Holding the bag at a 90-degree angle, pipe a ring of frosting around the outer edge of the cake, keeping a 1/8-inch border at the very edge. Starting at the inner edge of the border, spiral inward filling in the center of the ring to make an even layer of buttercream. Holding an offset spatula flat on the inside ring of frosting, with the spatula centered on the cake, smooth the inside of the ring, leaving the piped edges untouched.
7. Double-check a second cake layer for crumbs, then place it on top of the buttercream layer. Using your fingertips, gently center the cake on top. Be sure not to press too hard so that the buttercream spreads over the edge. Repeat with a layer of buttercream just like you did on top of the first cake layer.
8. Double-check the third and final cake layer for crumbs, then place it on top. Using your fingertips and gentle pressure, press down in the center and out to the edges to coax the frosting to align with the cake edge, but not beyond, on all sides.
9. For the top layer, pipe a ring of buttercream around the edge, leaving a 1/8-inch margin. Fill in the center with slightly more frosting than the inner layers. Using a small offset spatula, smooth the center first by rotating the cake stand, then gradually work out to the edges, pushing the frosting out very slightly as you go.
10. If desired, in the center of the cake, scoop out a little hole in the frosting to make a setting for the rose. Nestle the rose in the hole and arrange the leaf next to it at a 45-degree angle. Very carefully transfer the cake on the board to a presentation platter.
11. This cake needs to be served at room temperature. Serve at once, or hold at room temperature for up to 4 hours. For longer storage, refrigerate for up to 3 days and remove from the refrigerator 4 hours before serving.
Double Chocolate Cake
Makes two 6-inch cakes
[Note: Only one cake is required for the Tomboy Cake; make two and freeze the second one, or bake as one 9-inch cake, or bake as individual cakes in ramekins or as cupcakes].
Made with both melted dark chocolate and cocoa powder, this chocolate cake is rich, complex, and bittersweet – a perfect match for sweet frostings, which is how you'll find it paired in our Tomboy Cake, Bittersweet Ganache Cake, and Old-Fashioned Cake. As with the other base cakes, this recipe yields two 6-inch cakes, so you can have one on hand in your freezer to decorate anytime.
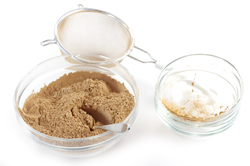
This cake is infallibly moist. Part of the reason for its fine-crumb texture is that we strain the batter through a sieve to remove any lumps before pouring it into the pans. Straining out the lumps rather than trying to stir them into the batter prevents overmixing and leads to a dense cake. We also sift the cocoa before dusting the pans, a technique that will give the exterior finish of your cakes a lovely smooth patina.
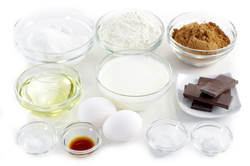
Ingredients
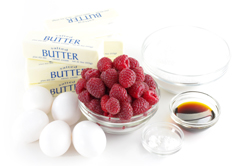
1-1/2 cups (7.5 ounces) all-purpose flour
1-1/4 cups (4.5 ounces) natural unsweetened cocoa powder
1-1/2 teaspoons baking soda
1/2 teaspoon baking powder
3/4 teaspoon kosher salt
2 ounces 70 percent cacao chocolate, coarsely chopped
1 cup boiling water
1 cup buttermilk
1/2 teaspoon vanilla extract
2 large eggs, at room temperature
1/2 cup vegetable oil
2-1/4 cups (16 ounces) sugar
Preparation
1. Liberally butter two 6-by-3-inch regular or contour cake pans and dust with sifted cocoa powder. Tap out the excess cocoa.
2. Preheat the oven to 350°F.
3. Sift together the flour, cocoa powder, baking soda, baking powder, and salt into a bowl and set aside.
4. Put the chocolate in a heatproof bowl and pour the boiling water over it. Whisk until the chocolate is melted. Let the mixture cool for 15 minutes.
5. In a separate bowl, whisk together the buttermilk and vanilla. Set aside.
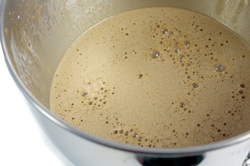
6. In the bowl of a stand mixer fitted with the whisk attachment, whisk the eggs on high speed until foamy, about 2 minutes. Reduce the speed to low and slowly pour in the oil, whisking until combined, about 30 seconds. Raise the speed to medium and whisk until fully incorporated, about 30 seconds longer.
7. Reduce the speed to low and slowly pour the cooled chocolate mixture into the egg mixture. Slowly pour in the buttermilk and vanilla mixture. Add the sugar and whisk until the batter is smooth and liquid, about 2 minutes.
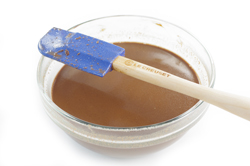
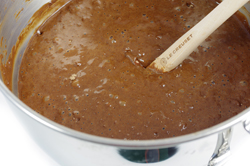
8. Stop the mixer, Remove the bowl and add the sifted dry ingredients and mix until just incorporated, preferably by hand, lifting and folding in from the bottom center. Using a rubber spatula, scrape down the sides of the bowl and mix again just briefly by hand. The batter may still look a little lumpy, but stop mixing.
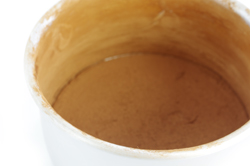
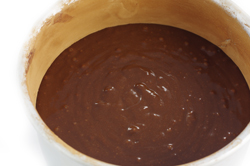
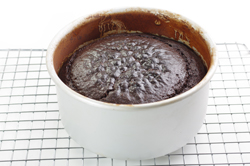
9. Pour the batter through a medium-mesh sieve into a large measuring cup or bowl to remove any lumps. Press against the solids in the sieve with a rubber spatula to push through as much batter as possible, then discard the lumps. Divide the batter between the prepared pans. Bake until the tops spring back when lightly pressed and a tester inserted in the centers comes out clean, 45 to 50 minutes.
10. Transfer to wire racks and let cool in the pans for about 20 minutes. When the cakes are cooled enough to handle the pans but still a tad warm to the touch, carefully run an offset spatula around the edges of the pans to loosen them, then invert the cakes onto the racks and remove the pans. Let cool for about 20 minutes longer. Wrap the cakes tightly in plastic wrap and refrigerate to ensure that the interiors are completely cooled before decorating, at least 1 hour or for up to 3 days. To freeze, wrap tightly in a second layer of plastic and store in the freezer up to 2 months.
Note: We use natural cocoa powder not Dutch-processed, as the Dutch-processed cocoa has been treated with an alkalizing agent that heightens the color but gives it a milder flavor. For this recipe, it is important to use natural product such as Scharffen Berger to attain a deep, dark chocolate flavor. |