Fall 2009
Cooking Classes
|
FALL
2009 COOKING CLASSES are OPEN for
REGISTRATION
Register Online,
In-Person, or by Telephone
Harper's Point
classes - Call 513-489-6400 Settler's Walk
classes - Call 937-748-4540
www.cookswaresonline.com
To view all of the details, visit our
website now and plan some fun this autumn!
Limited seating --
Plan early, then Register!
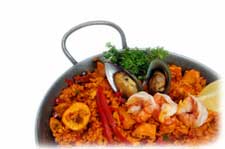 Tues, September 1 - Paella Party with
Hector EsteveSettlers' Walk Tues, September 1 - Paella Party with
Hector EsteveSettlers' Walk
from 6:30 - 9:00pm $45
Harper's Point
classes - Call 513-489-6400
Your Cooks'Wares Bonus:
Cooks'Wares offers a 10% Discount
on your merchandise purchases
on the
day you attend class! (excluding kitchen
electrics) |
Build a
Better Lunch!
|
Looking for
motivation to upgrade your lunch habits? We have several good
reasons to offer that will help overcome some of the common
obstacles to packing a good lunch for yourself or for your
family.
 Stockpile
Some Cash - Even a simple lunch out can be $6-10. A
packed lunch from home can cost anywhere from $2-4. If you save
$4/day for 20 workdays per month, that's $80/month, or $960/year. To
paraphrase Will Rogers, this starts "to add up to some real money!" Stockpile
Some Cash - Even a simple lunch out can be $6-10. A
packed lunch from home can cost anywhere from $2-4. If you save
$4/day for 20 workdays per month, that's $80/month, or $960/year. To
paraphrase Will Rogers, this starts "to add up to some real money!"
Improve Your
Nutrition - Food is fuel! Lunch should provide no more than
one-third of your daily calories. High fat and/or high carbohydrate
lunches can easily exceed that one-third rule, and actually slow you
down for the afternoon. We're surrounded by high calorie and high
fat options everywhere! A Big Mac® contains 540 calories and 29
grams of fat; add a large fry and you're adding another 500 calories
and 25 more grams of fat. Even fast food salads with fat-laden
dressings can tip into the "too much" range. Lunch is a great chance
for making good on that intention to improve your diet. Planning
good food ahead of time and packing a lunch will provide better fuel
for your body!
Save
Time - Fast food really isn't all that fast! By the
time you drive or walk to the restaurant, wait in line, wait for
your order and drive back, at least 10-15 minutes have passed. A
great lunch can be packed at home in less than 10
minutes!
Use Less
Packaging - Packing a lunch in reusable containers avoids
fast food packaging and all of the waste that accompanies one quick
meal.
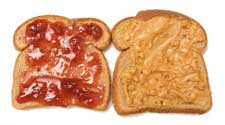
Fight Boredom with Creativity and
Variety - Lunch can be so much more than a peanut butter
sandwich and a side of carrot and celery sticks!
- Incorporate more fruits and veggies in your lunch with grape
tomatoes, cucumber sticks, berries, grapes, broccoli "trees," or
whatever's in season.
- Avoid packing processed foods - they're generally more
expensive, have questionable ingredients, are packaging intense,
and often nutritionally suspect with high sodium and
preservatives.
- Have a quick Plan B for those hurried mornings! A Plan B might
include freezing several sandwiches ahead of time, or individual
portions of previous suppers.
- Apportion tomorrow's lunch before serving tonight's supper.
You'll avert the risk of there being no leftovers available after
the meal.
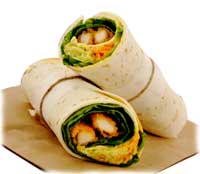 Enjoy
packing a good sliced bread sandwich, but don't forget about
wraps, pita bread, bagels, rice cakes, crackers, English muffins,
or croissants as sandwich foundations. Enjoy
packing a good sliced bread sandwich, but don't forget about
wraps, pita bread, bagels, rice cakes, crackers, English muffins,
or croissants as sandwich foundations.
- Make that apple more enticing - slices (drizzled with a little
lemon juice to prevent browning) might be easier to handle at
lunchtime. Include vanilla yogurt for a quick dip, or a nut butter
for smearing on the fruit.
- What to drink? Skip sugary drinks. Pack a lime or lemon slice
to dress up tap water. Perhaps some herbal tea - hot or cold. You
could even rediscover milk at lunch - we're told we all need more
calcium and Vitamin D.
- Watching your calories? Packing your own lunch is a great
start. Bring an open-faced sandwich and you've sliced the bread
calories in half. Or, use a lettuce leaf for a sandwich wrapper.
- Explore bean spreads (hummus, refried beans), tapenades,
guacamole, or cream cheese spreads with your own diced vegetable
and fruit "mix-ins."
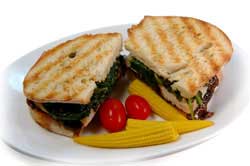
- A layer of wilted greens sautéed in garlic is an easy solution
for injecting leafy green vegetables into your sandwich.
- Make lunch kebabs of meat and cheese, veggies and fruits. You
could even make some antipasto on a stick!
- Make your own trail mix - GORP - 'Good Ole' Raisins and
Peanuts' - or any combination of dried fruits, nuts, crunch, and
sparkle (M & M's?).

- Investigate some hearty salads - bean salads, meat salads,
pasta salads, veggies with pesto.
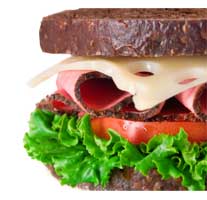
- Change the types of bread used in sandwiches - rye,
pumpernickel, oatmeal, baguette, sesame - there are scores of
bread choices. Similarly, vary your choice of cheeses and meats.
- Dress up leftover rice or pasta with nuts, herbs and a simple
dressing of olive oil and a flavored vinegar. Add a few leftover
vegetables, and it's a complete meal.
- Review the calorie count and nutritional profile of your
packed lunch - too little, too much, or just
right?
|
Make It
Easy!
|
You're much
more likely to establish a habit of packing lunch if you have a plan
and the right set-up for food on the go! Set yourself up with
appropriate lunch tools!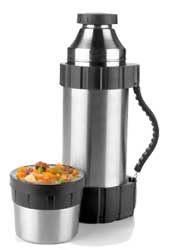
Thermoses - To keep hot foods hot,
and cold foods cold, use a thermos. This isn't just a matter of
having a pleasant food experience, it promotes food safety by
keeping foods out of the temperature range that promotes bacterial
growth. Beverage thermoses are typically tall and narrow, and often
double as drinking mugs. Many styles with stainless steel,
double-walled construction are available. Previously, thermoses
relied on glass inserts which had the nasty habit of
breaking.
Wide-Mouthed
Thermoses - Shaped differently, constructed similarly to
other thermoses, these units are perfect for soups, stews, or your
favorite chili.
The New Brown
Bag - How do you carry your lunch? The brown paper sacks of
our youth are largely gone. Today, it's about insulation! Small
coolers, insulated 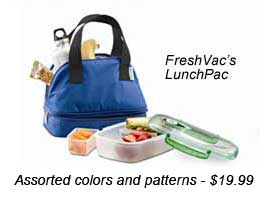 nylon bags,
reusable canvas bags are all perfect for toting lunch, and keep food
appealing and safe. nylon bags,
reusable canvas bags are all perfect for toting lunch, and keep food
appealing and safe.
Ice Packs - If you don't have
access to a refrigerator at work or school, keeping food from
getting too warm before lunch time is important. Use small gel packs
designed specifically for use with food, or create your own with
frozen water in zippered plastic bags. Freezing your sandwich or
your lunch's drink provides an additional source of coolness for
your lunch pack.
Food
Containers - Lunch can be
one of the most intensive meals for generating waste. In the
fast food world, Styrofoam® clamshells, cardboard
pac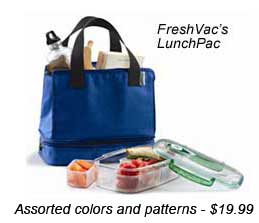 kaging, drink
containers and individual
packaging of all types easily
generates amountain of
trash. A modest investment kaging, drink
containers and individual
packaging of all types easily
generates amountain of
trash. A modest investment
in great
food containers not only saves on trash, but creates a pleasant meal
experience. Throw in a cloth napkin and create some thrifty
elegance! Containers from other cultures are interesting and
practical. Seek out Indian tiffin tins or Japanese Bento boxes.
Silverware - Pack the real stuff!
It's environ-friendly and so much nicer to dine with than flimsy
plastic versions that break when spearing a cherry tomato. If you're
cramped for space in your lunch pack, a "spork" might be your
answer! |
Knives 101 -
Part Two of Two
|
Last issue we
discussed the basic parts of every knife. In this issue we uncover
the reasons for the many shapes of knives and how to choose the
right knife for the task at hand. If you've perused our knife
display cases, the different shapes of knives and their blades can
be confusing. Each knife has been designed with specific tasks in
mind with the shape of the blade directly related to the knife's
function. For our discussion we'll categorize knives into four
types:
Slicing
Knives - As the name implies, these knives are for
slicing and cutting a variety of foods. They may have one of four
edges:
- Straight
edges are for normal slicing. The blade should be no more
than 1/8-inch thick and no taller than 1-1/2-inches high.
- Serrated
edges should be used for softer foods such as, bakery items
and some fruits and vegetables.

- Scalloped
edges (the reverse of a serrated edge) is also used for
softer foods and occasionally semi-frozen meats being sliced
thinly as in the case of stir-fry preparation.
- Hollow
edges, sometimes termed a Granton® edge, are for slicing
thick cuts of meat or other foods where the face of the cut
surface might tend to crumble or stick to the knife as with cheese
and many processed meats.
Chef or Cook's Knives - This is the
basic kitchen knife and is sometimes categorized as a "chopper."
These knives are tapered from point to handle. They should be at
least 2 inches high with 6 to 12 inches of 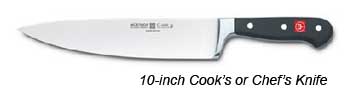 blade
length. The 8-inch blade size is the most popular length, though the
10-inch blade is the preference of most professionals. This knife is
used for chopping and slicing vegetables and fruits, and for mincing
and dicing tasks. A chef's knife is one of the most important knives
you can own. blade
length. The 8-inch blade size is the most popular length, though the
10-inch blade is the preference of most professionals. This knife is
used for chopping and slicing vegetables and fruits, and for mincing
and dicing tasks. A chef's knife is one of the most important knives
you can own.
Fine-work
Knives - This group of knives includes paring knives of all
types. These knives are used for peeling, cutting out gristle from
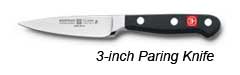 meats,
or removing bad spots from foods. Choose a blade length that you are
most comfortable with in your hand and for the task. Boning knives
and fillet knives fall into this category and usually sport a
narrow, flexible blade that is quite handy when deboning meat, fowl,
or fish. meats,
or removing bad spots from foods. Choose a blade length that you are
most comfortable with in your hand and for the task. Boning knives
and fillet knives fall into this category and usually sport a
narrow, flexible blade that is quite handy when deboning meat, fowl,
or fish.
Special Use
Knives - 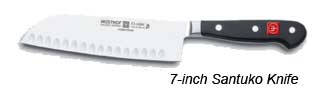 This
grouping of knives includes cleavers, Asian chef's knives such as
Santokus, garnishing knives, and other very, task-specific
knives. This
grouping of knives includes cleavers, Asian chef's knives such as
Santokus, garnishing knives, and other very, task-specific
knives.
A basic cutlery set-up should start with a Chef's knife (8 or 10-inch), a
Paring knife (2 ½ - 3 ½
-inch), a Serrated Slicer or Bread
Knife, and a Slicing
Knife (8 to 10-inch blade). Buy the best knives you can
afford adding to your collection when you can. Take care of your
knives and they will reward you with years and years of
service!
|
Q &
A's
|
Q: How does a thermos
work?
A: Hot foods or cold
foods all move toward room temperature. A thermos provides
insulation around the food in the form of a vacuum or foam
insulation neither of which transfer heat in or out very well; the
hot or cold temperature of the food is retained. To maximize the
insulating thermos' capabilities, prime the thermos with very hot
water, or ice water; let set for 5 minutes to allow the temperature
to 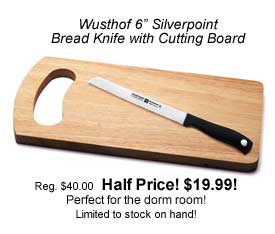
permeate
the inside of the thermos. Then fill with the very hot or very cold
foods. A good thermos properly prepared will keep foods safe for
several hours.
Q: How
is a bread knife sharpened?
A: Bread knives, like other
knives, have a serrated edge. This dimpled edge, which is so useful
for grabbing the food when cutting, is beyond the capabilities of
the average sharpener. Each indentation must be sharpened
individually with the proper tool by professionals trained on
serrated edges.  The
good news is that, used properly for the right task, your bread
knife will rarely require sharpening. The
good news is that, used properly for the right task, your bread
knife will rarely require sharpening.
Q: What food safety rules apply to
packed lunches?
A: Keep hot foods hot, and
cold foods cold! It's recommended that food not sit at room
temperature for more than 2 hours. If the temperature is 90°F or
more, then only 1 hour. Pack foods in insulated containers or bags
that retain the hot or cold temperatures of the food. Leave your
lunch in the refrigerator overnight or until you're ready to leave
the house. Take care during lunch preparation not to introduce
bacteria to your food with any cross-contamination. Lunch meat, once
the package is opened, should be eaten within 3-4 days.
Q: What is the recent controversy
over unsafe plastic bottles?
A: Some plastics used in
water and juice bottles degrade when reused over and over again
potentially producing bisphenol A - (BPA). Opt for plastic water
bottles that are BPA-free or units constructed of stainless steel
for your reusable water
bottle.
|
Cookbook
Review
|
'wichcraft
by Tom Colicchio and Sisha Ortúzar. Text by Rhona Silverbush,
Photographs by Bill Bettencourt. Copyright 2009. Published by
Clarkson Potter/Publishers, an imprint of the Crown Publishing
Group, a division of Random House, Inc., New York, NY.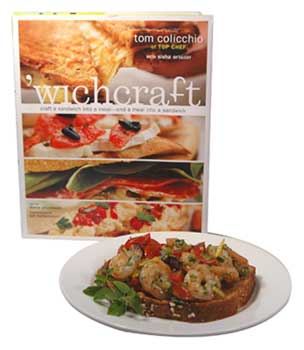
The
clever name and the sumptuous photographs had us falling in love
with this cookbook immediately! Tom Colicchio, of Bravo's "Top Chef" show and his business
partner, Sisha Ortuz, started a 'wichcraft restaurant in New York
with the idea that a great sandwich would be appreciated and sought
after. They were right, twice - through the restaurant and through
this recently released book. The cookbook goes a long way in solving
the conundrum of creating interesting sandwiches, yet ones that are
accessible in the home kitchen. The book is organized around
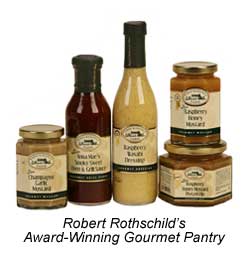
breakfast sandwiches, cool sandwiches, warm sandwiches, and sweet
sandwiches. Between each category, useful tips on building a great
pantry, bread basics, party fare and many more topics are presented.
The be'wiching thing about this book is the exquisitely devised
recipes where the ingredients perfectly complement each other. With
innovation and creativity applied to the humble sandwich, Colicchio
and Ortúzar have broken new ground on our behalf and to our great
satisfaction.
|
Recipes for
Fabulous Sandwiches
|
Reprinted with permission from 'wichcraft by Tom
Colicchio and Sisha Ortúzar, Text by Rhona Silverbush, Photographs
by Bill Bettencourt. Copyright 2009. Published by Clarkson
Potter/Publishers, an imprint of the Crown Publishing Group, a
division of Random House, Inc., New York, NY. Copyright 2009. All
rights reserved.
Gruyère with
Caramelized Onions
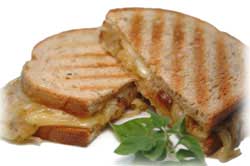
You'll
never think of a "grilled cheese sandwich" in the same way again!
The piquant cheese choice of Gruyère paired with the sweetness of
the slowly cooked onions fashioned a sandwich where every bite was
savored. The extra sandwich we made at suppertime, reheated nicely
for lunch the next day doubling our enjoyment.
Click here to view the full
recipe.
Click here for a printable version of
the recipe.
Roasted Shrimp
Salad with Tomatoes and Olives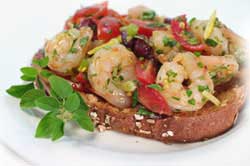
The
authors described this shrimp salad (no mayo here!) as a shrimp
scampi sandwich. We couldn't agree more. The fresh vegetables and
herbs accentuated the garlicky shrimp. Heaped on toast that had been
gently rubbed with garlic, there was almost a panzanella aspect to
this recipe. The open-faced sandwich assembled easily for a
better-than-average lunch.
Click here to view the full
recipe.
Click here for a printable version of
the recipe.
Roasted Pork
Loin with Prunes, Dandelion Greens, and Mustard
 This
sandwich proved to be a hearty supper meal with a perfect blend of
great complex tastes that were easy to recreate. The seared pork
tenderloin was complemented with the mustardy sweetness of the
plums. We substituted spinach for the dandelion greens and enjoyed
the garlic and vinegar flavorings of the greens with each bite of
the sandwich. The extra fixings made a great lunch the following
day. This
sandwich proved to be a hearty supper meal with a perfect blend of
great complex tastes that were easy to recreate. The seared pork
tenderloin was complemented with the mustardy sweetness of the
plums. We substituted spinach for the dandelion greens and enjoyed
the garlic and vinegar flavorings of the greens with each bite of
the sandwich. The extra fixings made a great lunch the following
day.
Click here to
view the full
recipe.
Click here for a printable version of
the
recipe.
| |


 applied to packing your lunch. Yes, it's the back to
school time of year, but packing a great lunch is not just for
kids anymore! Packing your lunch saves money, shifts
nutrition for the better, and, in the end, saves time. A great
lunch is the perfect respite in the middle of a busy day and
offers that necessary refueling for the afternoon ahead. In
this issue, we'll offer a slew of tips for a better lunch and
how to make it easy. We complete our Knives 101 discussion
with Part 2. A review and three recipes from Tom
Colicchio's new book,
applied to packing your lunch. Yes, it's the back to
school time of year, but packing a great lunch is not just for
kids anymore! Packing your lunch saves money, shifts
nutrition for the better, and, in the end, saves time. A great
lunch is the perfect respite in the middle of a busy day and
offers that necessary refueling for the afternoon ahead. In
this issue, we'll offer a slew of tips for a better lunch and
how to make it easy. We complete our Knives 101 discussion
with Part 2. A review and three recipes from Tom
Colicchio's new book, 


 Tip
#5:
Tip
#5: