| September
Cooking Classes |
|
Thu, Sep 11 - How to Preserve Fresh Flavor with Cindi
Remm
Settlers'
Walk from 6:30 - 9:00pm. $35
Mon, Sep 15 - Gluten, Dairy & Soy Free Baking with Laura
Karasek
Harper's Point from 6:30 -
9:00pm. $40
(Also offered Thu, Oct 2 at Settlers' Walk).
 Tue, Sep 16 - Organic - Quick & Delicious with Robin Gentry
McGee Tue, Sep 16 - Organic - Quick & Delicious with Robin Gentry
McGee
Settlers'
Walk from 6:30 - 9:00pm. $40
Wed, Sep 17 - Elegant Dinner for Two - or More - Craig &
Jessica Zimmerman
Harper's Point from 6:30 -
9:00pm. $40
Thu, Sep 18 - It's Chili Time! with Ken Kavensky
Harper's Point
-from 6:30 - 9:00pm. $38
Thu, Sep 18 - Cooking for the Week: Classic Italian with Sean
Schmidt
Settlers'
Walk from 6:30 - 9:00pm. $45
(Also offered Wed, Sep 10 at
Harper's Point).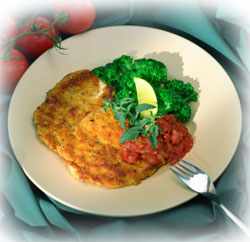
Mon, Sep 22 - A Fall Menu from 20 Brix with Paul
Barraco
Harper's
Point from 6:30 - 9:00pm. $45
Mon, Sep 22 - Stir Frying Secrets with Lorraine Gose
Settlers' Walk from
6:30 - 9:00pm. $40
Tue, Sep 23 - Breakfast for Dinner with Heather Poast
Harper's Point from
6:30 - 9:00pm. $38
Mon, Sep 29 - Authentic German Comfort Food with David
Sauer
Settlers'
Walk from 6:30 - 9:00pm. $35
REGISTER ONLINE, IN-STORE,
OR BY PHONE FOR FALL CLASSES
For Harper's Point classes - call
513-489-6400
For
Settlers' Walk classes - call 937-748-4540
10%
Discount on merchandise purchases
on
the day you attend class! (excluding kitchen
electrics) |
It's All
About the Crust
|
People are
passionate about their crust preferences - including us! What
we've been discovering, however, is that we can have more than one
preference and expand our enjoyment in multiple ways for different
occasions.
Flour, water, and salt are the basics of any
bread. Adding yeast will make it a leavened version, or not,
and it's unleavened. From these humble ingredients, the search
for just the right proportions and the best mixing methods
begins. A good dough will be easy to handle and "stretchable"
into a flat baking surface. The addition of a little olive oil
will add some flavor and softness to the dough.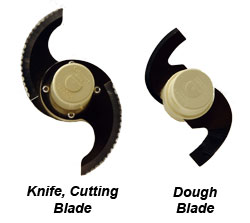
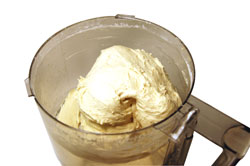
A food processor is the perfect tool
for mixing the bread dough. With ten minutes of hands-on
action, you'll have your pizza foundation done. Outfit the
processor with its dough blade for this process. The dough
blade has shorter wings with dull edges that powerfully mix the
dough without cutting the developing gluten
strands.
Alternatively, a stand mixer will also make quick
work of mixing the dough. Begin mixing the dough with the
standard paddle attachment, then switch to the dough hook to
complete the mixing and kneading.
Our Basic
Pizza Dough
(Click here for a printable version of
the recipe).
1 package active dry yeast
1 cup warm
water (110 F)
2 Tablespoons olive oil (plus additional 1 T. for
coating bowl and dough)
3 cups flour (preferably a high-gluten
flour, like bread flour)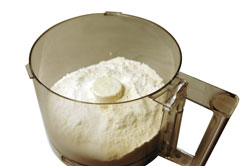
1-1/2 teaspoons salt
Makes 2 large
12" pizza crusts.
- Dissolve and activate the yeast in warm water, and let the
mixture stand for 5 minutes or until the surface appears bubbly
and foamy.
- Meanwhile, measure and combine the flour and salt in the work
bowl of your food processor or stand mixer.
- Add the olive oil to the flour mixture as a drizzle while
pulsing the food processor, or while on the lowest speed of the
stand mixer.
- Add nearly all of the water and yeast mixture while continuing
to pulse or mix. Reserve a bit of the liquid to add only if
the dough requires. The dough should mix up easily, and
quickly form a ball of dough. If still crumbly, add
additional liquid until a dough ball is formed.
- Continue to pulse the dough ball to knead it for about 45
seconds.
- Remove the dough from the work bowl and knead it into a ball
on a lightly floured surface. Be cautious in adding too much
flour during the kneading and shaping process.
- Drizzle a small amount of oil in a deep bowl and rub up the
sides of the bowl. Place the dough ball in the bowl and
rotate in order to cover the dough's surface with a light layer of
the oil.
- Cover and let rise until doubled, about 2 hours.
- Divide the dough into two parts. You may use both crusts
immediately, pre-bake the crusts for pizza-making later, or freeze
all or part of the dough at this stage for later
use.
Improvise your
own signature variation of the dough with the addition of herbs,
Parmesan cheese, or by substituting up to 6 Tablespoons of the bread
flour with another flour such as whole wheat or
cornmeal.
|
Baking in Flavor
|
The smell of
fresh bread baking is an aphrodisiac! Add the warm smells of
sauce and herbs, and the pleasure is only further enhanced.
Pizza baking at home may be accomplished in a couple of
ways.
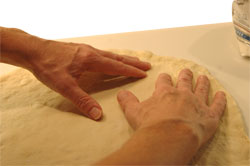
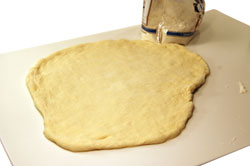 After the dough has risen once, it's ready to
form into a crust. Flatten the dough on a lightly floured
surface with the palm of your hand. Beginning in the middle of
the disc, press the dough with the fingertips of both hands
stretching the dough outward. Continue pushing and stretching
the dough outward until the dough is evenly thin and about 12 inches
in diameter. While stretching the dough, it's helpful to
rotate the dough slightly with each motion on a lightly floured
surface. While potentially showy, throwing the dough in the
air to stretch it, it is not necessary for great taste! After the dough has risen once, it's ready to
form into a crust. Flatten the dough on a lightly floured
surface with the palm of your hand. Beginning in the middle of
the disc, press the dough with the fingertips of both hands
stretching the dough outward. Continue pushing and stretching
the dough outward until the dough is evenly thin and about 12 inches
in diameter. While stretching the dough, it's helpful to
rotate the dough slightly with each motion on a lightly floured
surface. While potentially showy, throwing the dough in the
air to stretch it, it is not necessary for great taste!
Sauce and
Toppings - We won't dwell on the topic of sauce and toppings
just too much other than to say: (1) Pack some intense flavor
in your sauce, keep it thick, and apply lightly, and (2) Apply
toppings in a scattered fashion making each bite interesting, not a
mile high.
Oven
Baking - Commercial pizzerias have the advantage of very hot
ovens, sometimes up to 800 degrees F. We can't fire up our
home ovens quite that high, but w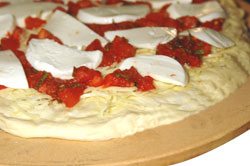 e can create a hot environment that will
do the job. Fresh, homemade pizza dough requires not only a
hot oven, 500 degrees F, but also direct contact with a very hot
surface. A pizza stone is an invaluable surface for getting
the crust just right. Here's how it works. The stone
surface is porous in nature and absorbs some of the moisture from
the dough resulting in a perfect crust - one that is not too doughy
or soggy, but with a slightly crispy bottom, perfect for eating from
the hand. Place the manufactured "stone" in the oven as you
turn it on to preheat. Stones are about 3/8-inch thick and
gather the oven's heat. Allow the stone to heat in the hot
oven for at least 30 minutes prior to directly placing the crust on
it to bake. e can create a hot environment that will
do the job. Fresh, homemade pizza dough requires not only a
hot oven, 500 degrees F, but also direct contact with a very hot
surface. A pizza stone is an invaluable surface for getting
the crust just right. Here's how it works. The stone
surface is porous in nature and absorbs some of the moisture from
the dough resulting in a perfect crust - one that is not too doughy
or soggy, but with a slightly crispy bottom, perfect for eating from
the hand. Place the manufactured "stone" in the oven as you
turn it on to preheat. Stones are about 3/8-inch thick and
gather the oven's heat. Allow the stone to heat in the hot
oven for at least 30 minutes prior to directly placing the crust on
it to bake.
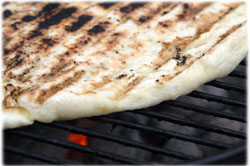 Outdoor Grilling - This method of
pizza making is old-world traditional and new-world cutting edge at
the same time. The flavors imparted by the grill add
tremendous depth to the final result. The dough is prepared
similarly to the above instructions with an emphasis on thinness and
evenness. Prepare a hot, direct grill; oil the grate, and
place the dough, without toppings, directly on the grate. With
in a minute you'll see evidence of the high heat doing its
work. Check the bottom side frequently to avoid burning.
Once browned, turn the crust over with a pair of tongs and quickly
add the desired toppings. Grilling pizza masters suggest
putting any cheese toppings on as the first layer, then the
remaining toppings. Grilled pizzas sport toppings judiciously
with components dotting the surface instead of adding layers on
layers. Outdoor Grilling - This method of
pizza making is old-world traditional and new-world cutting edge at
the same time. The flavors imparted by the grill add
tremendous depth to the final result. The dough is prepared
similarly to the above instructions with an emphasis on thinness and
evenness. Prepare a hot, direct grill; oil the grate, and
place the dough, without toppings, directly on the grate. With
in a minute you'll see evidence of the high heat doing its
work. Check the bottom side frequently to avoid burning.
Once browned, turn the crust over with a pair of tongs and quickly
add the desired toppings. Grilling pizza masters suggest
putting any cheese toppings on as the first layer, then the
remaining toppings. Grilled pizzas sport toppings judiciously
with components dotting the surface instead of adding layers on
layers.
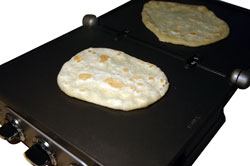 Indoor Grilling - Yet a different
method for preparing pizza crust employs your stovetop griddle, an
electric griddle, or a panini press. The size of the griddle
will determine the size of pizza. For the recipe above, divide
the dough into 4 pieces instead of 2 pieces. Heat the griddle
to a 400-450 degree temperature. When a drop of water sizzles across
the surface, the griddle is ready. Stretch the dough to a near
translucent thickness and place on the griddle. Check the
underside after 2 minutes or until golden brown marks begin to
appeara, then flip to grill the other side. When both sides of
the crust are done, add toppings. Place assembled pizzas under
the broiler for a couple of minutes until the toppings are heated
and any cheeses are melted. Alternatively, grill both sides at once
with a panini press! Indoor Grilling - Yet a different
method for preparing pizza crust employs your stovetop griddle, an
electric griddle, or a panini press. The size of the griddle
will determine the size of pizza. For the recipe above, divide
the dough into 4 pieces instead of 2 pieces. Heat the griddle
to a 400-450 degree temperature. When a drop of water sizzles across
the surface, the griddle is ready. Stretch the dough to a near
translucent thickness and place on the griddle. Check the
underside after 2 minutes or until golden brown marks begin to
appeara, then flip to grill the other side. When both sides of
the crust are done, add toppings. Place assembled pizzas under
the broiler for a couple of minutes until the toppings are heated
and any cheeses are melted. Alternatively, grill both sides at once
with a panini press!
 Moving the thinly stretched dough or assembled
pizza from countertop to oven or grill is a tricky process. Moving the thinly stretched dough or assembled
pizza from countertop to oven or grill is a tricky process.
 Deploy a pizza peel like the professionals
do! We use our peel as the working surface for the dough in
the final stages, then slide the pie onto the stone or grate with
ease. When finished baking, use the peel again to remove the
pizza from the cooking surface. Deploy a pizza peel like the professionals
do! We use our peel as the working surface for the dough in
the final stages, then slide the pie onto the stone or grate with
ease. When finished baking, use the peel again to remove the
pizza from the cooking surface.
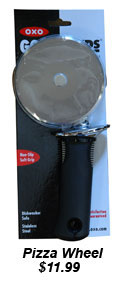
The best way to cut a
pizza is an opinionated subject! We'll stay out of the fray by
offering several methods for serving up your masterpiece. A
knife's edge, whether on a chef's knife or a mezzaluna, will push
the ingredients downward and "crack" the crust. A pizza wheel
will slice through thick or thin pizza with ease, and pizza scissors
are great for kids to slice any size of
pizza.
|
Piadinas
|
 Every culture seems to have its own version of
an unleavened flatbread for quick meals or as a canvas for dips and
sandwiches. In Mexican cultures, it's the tortilla; for East
Indians, it's the chapati; with Middle Eastern groups, it's pita
bread. For Italians, it's the piadina. Ready in minutes,
the flatbread may be folded over tempting fillings in the
traditional way, or left open and topped for an individual pizza
style of meal. The dough for a piadina is similar to pizza dough,
but without the yeast leavening. Every culture seems to have its own version of
an unleavened flatbread for quick meals or as a canvas for dips and
sandwiches. In Mexican cultures, it's the tortilla; for East
Indians, it's the chapati; with Middle Eastern groups, it's pita
bread. For Italians, it's the piadina. Ready in minutes,
the flatbread may be folded over tempting fillings in the
traditional way, or left open and topped for an individual pizza
style of meal. The dough for a piadina is similar to pizza dough,
but without the yeast leavening.
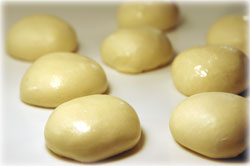
Mix the above dough
recipe, but eliminate the yeast. After mixing, allow the dough to
rest for about 30-45 minutes; this will soften the dough, increase
the elasticity, and make the dough easier to stretch into shape.
Divide the dough into 8 pieces, each about the size of a small
tangerine. Oil each portion to prevent drying out, and to make
the handling of the dough easier.
Beginning in the middle of
each piece, flatten the dough with your fingertips until the piece
is uniformly thin. Place the stretched dough on a hot grill,
griddle, or heated oven stone. Check the underside after one
minute, turn over when the bottom has started to brown.
 Top one-half of the bread with sandwich fillings
- cheese, meat, vegetables, (see Recipe below) - fold the bread over
the fillings, heat on each side if desired, and serve immediately. Top one-half of the bread with sandwich fillings
- cheese, meat, vegetables, (see Recipe below) - fold the bread over
the fillings, heat on each side if desired, and serve immediately.
Piadinas are a great way for groups to custom-make
their own sandwich with fresh, warm bread. Have filling
choices ready prior to grilling the piadina crusts. The
piadina dough may be kept in the refrigerator for up to three days
allowing individuals to bake when the mood strikes. Alternatively,
all of the piadina dough may be baked or grilled and cooled crusts
wrapped tightly and frozen for easy access. A panini press
bakes the crust nicely, and when filled and folded, heats the
contents from the bottom and the top at the same
time.
|
Smart
Pizza Making Tips
|
 Tip #1: Stretch the
pizza dough instead of rolling it with a rolling pin. A
rolling pin will crush the air out of the dough resulting in a
tougher crust. If the dough is difficult to stretch or recoils
on itself too easily, let it rest for a few minutes and stretch
again. Tip #1: Stretch the
pizza dough instead of rolling it with a rolling pin. A
rolling pin will crush the air out of the dough resulting in a
tougher crust. If the dough is difficult to stretch or recoils
on itself too easily, let it rest for a few minutes and stretch
again.
Tip #2:
Pizza can be notoriously high in calories. Making your own
pizza at home is a great way to enjoy a food favorite while managing
the calories. By choosing ingredients wisely, adding satisfying
flavors with extra herbs and spices, and applying a deft hand with
the toppings, you can reduce the calories of your favorite pizza or
piadina, yet have all the satisfying
flavors.
|
Q & A
|
|
 Q:
What type of yeast should be used for pizza crust? Q:
What type of yeast should be used for pizza crust?
A:
Generally, the choice of baking yeast is between "active, dry
yeast," o r "instant yeast." Active yeast
requires separate dissolving and usually a second rising
session. Instant yeast is very finely ground and does not
require the same dissolving or proofing, nor does it require a
"second rising." Either yeast will work for pizza dough since
no second rising is necessary. If using "instant yeast," add
it to the dry ingredients and then the recipe's liquid as
directed. r "instant yeast." Active yeast
requires separate dissolving and usually a second rising
session. Instant yeast is very finely ground and does not
require the same dissolving or proofing, nor does it require a
"second rising." Either yeast will work for pizza dough since
no second rising is necessary. If using "instant yeast," add
it to the dry ingredients and then the recipe's liquid as
directed.
Q: Is my food
processor big enough to mix this pizza dough recipe?
A: Food processors are sized
by the volume of solid food that their work bowl will hold and is
expressed as a "cup" capacity, e.g., 14-cup capacity, 7-cup
capacity, etc. No processor will hold as many cups of liquid
as they are rated for since the top of the "stem" is below the upper
edge of the work bowl. In other words, a 14-cup processor will
only hold about 8 cups of finished product. Our Basic Pizza Dough
recipe with 3 cups of flour is perfectly sized for an 11-cup or
larger work bowl.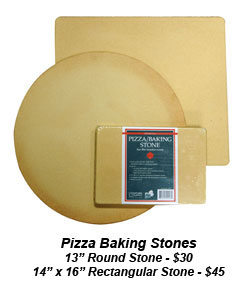
Q:
How can I keep my pizza crust from getting soggy?
A: Several situations might
be causing a soggy crust. First, examine the topping used to
make sure that excess water has been drained, especially water-laden
favorites such as tomatoes and spinach. Second, brush the
topside of the crust with a bit of olive oil to form a barrier to
any water in the toppings. Third, make sure your oven,
griddle, or grill is hot enough to sear the outside of the crust and
quickly cook the dough; baking too slowly will allow the toppings to
take over the crust. Fourth, use a pizza stone that has a moisture
absorbing quality, or a pizza screen that will allow moisture to
escape during baking.
Q: If I freeze extra pizza dough,
how do I use it later?
A: Mixing dough once and
using on two occasions is smart cooking! Let the mixed dough
rise before dividing into the "use now" and the "freeze for later"
portions. For freezing, form the dough into a ball, then
flatten it with your hands into a disc shape. Wrap securely in
freezer-grade plastic wrap or a freezer bag. The disc shape
will help the dough freeze faster and defrost more quickly.
Plan on about 2-3 hours for the dough to defrost and "come alive"
again.
|
Cookbook
Review
|
Grilled Pizzas
and Piadinas by Craig Priebe and Dianne Jacob, published by
DK Publishing, NY, NY. Copyright May 2008.
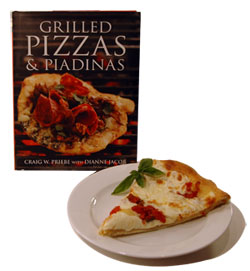 The simple peasant pizza becomes an art form
under the tutelage of Chef Priebe. His restaurant, C.K.'s
Grilled Pizza, formerly of Atlanta, garnered rave reviews from its
start including notoriety as "one of the six best pizzerias in
America" by Travel + Leisure magazine. From these years of
firsthand experience with grilled pizza comes this delightful
cookbook. With the first glance, a mouth-watering response is
elicited by the lavish, full-color photos. The desire to
experiment and make each version for one's self quickly
follows. Having caught our eye with the beautiful imagery, we
eagerly delved into the various sections: everything about
Grilling Pizzas, the presentation of Innovative Piadinas, separate
chapters on Pizza with Meat, Pizza with Chicken, Pizza with Seafood,
Pizza with Vegetables, the Perfect Salad accompaniments, and even
Dessert Pizza variations based on the grilled bread crusts. The book
describes, step-by-step, the secrets to successfully grilling bread
and imbuing subtle flavors with a mélange of ingredients. Chef
Priebe shares his own dough recipe and offers several variations
that will tantalize your tastebuds. With this book at your
side, you'll become a master of this once humble peasant food that
is anything but pedestrian with Chef Priebe's
incarnations. The simple peasant pizza becomes an art form
under the tutelage of Chef Priebe. His restaurant, C.K.'s
Grilled Pizza, formerly of Atlanta, garnered rave reviews from its
start including notoriety as "one of the six best pizzerias in
America" by Travel + Leisure magazine. From these years of
firsthand experience with grilled pizza comes this delightful
cookbook. With the first glance, a mouth-watering response is
elicited by the lavish, full-color photos. The desire to
experiment and make each version for one's self quickly
follows. Having caught our eye with the beautiful imagery, we
eagerly delved into the various sections: everything about
Grilling Pizzas, the presentation of Innovative Piadinas, separate
chapters on Pizza with Meat, Pizza with Chicken, Pizza with Seafood,
Pizza with Vegetables, the Perfect Salad accompaniments, and even
Dessert Pizza variations based on the grilled bread crusts. The book
describes, step-by-step, the secrets to successfully grilling bread
and imbuing subtle flavors with a mélange of ingredients. Chef
Priebe shares his own dough recipe and offers several variations
that will tantalize your tastebuds. With this book at your
side, you'll become a master of this once humble peasant food that
is anything but pedestrian with Chef Priebe's
incarnations.
|
Recipes
|
Recipes excerpted from Grilled Pizzas
and Piadinas by Craig Priebe and Dianne Jacob.
Published by DK Publishing, Inc., Copyright 2008. Reprinted
with permission. All rights reserved.
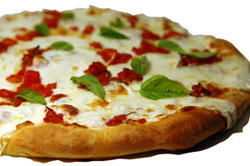
The
Margheritan
Traditional
Tomato, Basil, and Cheese
 Just the basics here, and they couldn't be
better! Two kinds of mozzarella cheese are used in this
version and pair beautifully with the rich tomato and basil
tastes. With fresh tomatoes and garden basil readily available
these days, this pizza is a natural for making tonight! It's
known as a classic and rightly so! Just the basics here, and they couldn't be
better! Two kinds of mozzarella cheese are used in this
version and pair beautifully with the rich tomato and basil
tastes. With fresh tomatoes and garden basil readily available
these days, this pizza is a natural for making tonight! It's
known as a classic and rightly so!
Click here to view the full
recipe.
Click here for a printable version of
the recipe.
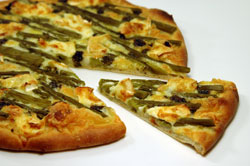
The
Asparago
Asparagus with
Pesto, Pine Nuts, and Brie
 We love asparagus and brie, but have never put
them together quite like this! The pesto ties it all together with
bursting flavor in every bite. We thought the brie might make
for a runny situation, but the slices held their own and added an
amazing creaminess to each bite. We think broccoli rabe would
work well with this recipe as a seasonal substitute for
asparagus. We love asparagus and brie, but have never put
them together quite like this! The pesto ties it all together with
bursting flavor in every bite. We thought the brie might make
for a runny situation, but the slices held their own and added an
amazing creaminess to each bite. We think broccoli rabe would
work well with this recipe as a seasonal substitute for
asparagus.
Click here to view the full
recipe.
Click here for a printable version of
the recipe.
The Gamberian
Sautéed Shrimp with Pesto
and Tomato
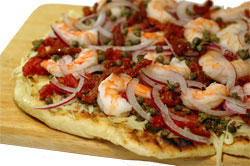 The mosaic of flavors in this award-winning
recipe is more than rewarding! With the sautéed shrimp, richly
flavored tomato sauce, dynamic pesto, thinly sliced red onions, and
tiny capers, each bite was a mouthful of pleasure. We
understand first-hand how this pizza won the prize! The mosaic of flavors in this award-winning
recipe is more than rewarding! With the sautéed shrimp, richly
flavored tomato sauce, dynamic pesto, thinly sliced red onions, and
tiny capers, each bite was a mouthful of pleasure. We
understand first-hand how this pizza won the prize!
Click here to view the full
recipe.
Click here for a printable version of
the recipe.
Piadina Dolce
e Salato
Soppressata with
Parmesan Crisps and Honey
This Italian "sandwich" bursts with flavors and
textures creating a full, well-rounded experience. We really like
our piadina bread - it's fresh, pliable, and super simple. We
mixed the basic dough as described above, but left out the yeast
leavening. We grilled up four pieces and filled according to
this recipe; the results were many, many oohs and aahs. We
kept the other four pieces of dough for the next day. Having
fresh bread in minutes made simple ham and cheese, and even a
PB&J, something special!
Click here to view the full
recipe.
Click here for a printable version of
the
recipe.
| |


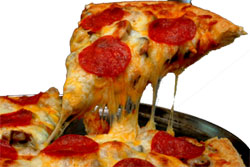 Thick, thin, deep or crispy, pizza has
enough personality for anyone's preference! Frozen,
pre-baked, delivery, carry-out, eat-in - it's all ready to be
yours! Taking the country by storm during the boom of
the post-WWII years, pizza became a people pleaser in every
neighborhood. Shelf space says it all.Take an inventory of the
frozen food aisle in your local market; we bet you'll find
one-quarter of it devoted to pizza in some form. What's
less common is making pizza regularly at home. Imagine
pairing the perfect crust with your best sauce and favorite
toppings, and enjoying it fresh from the oven. Creating
a repertoire of new, homemade pizza favorites will have you
deleting the pizzeria number from your speed dial list!
We'll demystify crust-making, offer baking tips, and present
some new flavor
variations.
Thick, thin, deep or crispy, pizza has
enough personality for anyone's preference! Frozen,
pre-baked, delivery, carry-out, eat-in - it's all ready to be
yours! Taking the country by storm during the boom of
the post-WWII years, pizza became a people pleaser in every
neighborhood. Shelf space says it all.Take an inventory of the
frozen food aisle in your local market; we bet you'll find
one-quarter of it devoted to pizza in some form. What's
less common is making pizza regularly at home. Imagine
pairing the perfect crust with your best sauce and favorite
toppings, and enjoying it fresh from the oven. Creating
a repertoire of new, homemade pizza favorites will have you
deleting the pizzeria number from your speed dial list!
We'll demystify crust-making, offer baking tips, and present
some new flavor
variations.