Recipes for a Putting on a Pizza Party
Basic Pizza Dough
Makes (3) 10-12" pizza crusts
Even when following the same recipe, every batch of pizza dough can vary depending on an array of external factors; how warm it is outside, the humidity, the time of year, and so on. The rise and fall of dough is truly influenced by its surroundings. (Based on this logic, this also means that approaching your pizza party with a positive pizza-making attitude, will obviously render a happier pizza dough!)
Before making the dough, place a pizza stone on the top oven rack and preheat the oven to 550°F to ensure the stone will be hot and ready once it's time for your pizzas to bake. A hot pizza stone results in a crispier bottom crust.
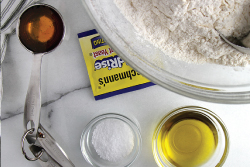
Ingredients:
1-1/2 cups warm water - 110*F
1 packet of fast-acting yeast
3.5 - 4 cups all-purpose flour
1 teaspoon sugar
1 teaspoon kosher salt
2 tablespoons olive oil
Directions:
1.
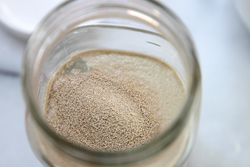
Measure and heat the water to 110°F. Sprinkle the yeast on top. Allow the yeast to stand undisturbed for a few minutes. It's ready to use when when it looks slightly foamy on top.
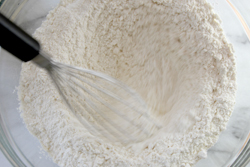
2. While the yeast is dissolving and activating, whisk 3.5 cups of the flour, salt, and sugar together in a large bowl.
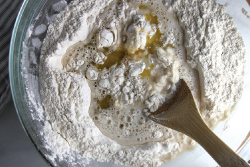
3. Add the olive oil to the yeast and water. Pour into the flour mixture. Using a large mixing spoon (and then your hands) stir to combine the mixture until a sticky dough forms and al of the ingredients are nicely incorporated.
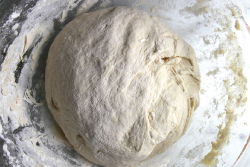
4. Cover the dough with a kitchen towel and let it double in size, about 30 minutes.
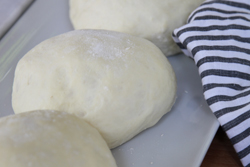
5. Transfer the dough to a floured surface and divide it into three even pieces. Knead each section of dough individually, adding a little bit of the remaining flour to the dough and the working surface as needed until the dough bowl is smooth, and not too sticky. Place the dough balls under a kitchen towel and let them rest for another 15 minutes.
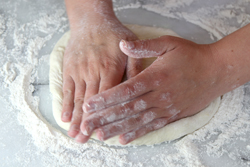
6. Select one ball of dough and place it on a lightly floured surface. With floured hands, begin to flatten the ball into a round disc, about 8”-12" in diameter, starting from the center and working out to form the crust. THe top of the dough ball will remain on top through this process. Try stretching the dough with the back of your hand, and avoid making holes.Use one of our stretching techniques below.
________________________
Dough Stretching Techniques:
• Pick up the dough and confidently slap it between your palms in a circular motion allowing it to stretch and grow.
• Drape dough over closed fists and start rotating dough while draping over your fists allowing it to stretch as your fists move.
• Hold the dough up by the edges and let the dough stretch under its own weight. Transfer the dough back to the floured working surface and continue to rotate dough in a circular motion using your hands to stretch and press the dough against the working surface.
• Drape the dough over the edge of your working surface and rotate the dough, allowing it to stretch under its own weight.
• Toss the dough with a bit of a spin 2 feet above your head to create a perfect circle that increases in size as it spins. Then, congratulate yourself for being a Professional Pizza Maker.
• As you work the dough, ensure that the dough does not stick to the working surface by rotating and moving it back and forth. Add more flour under the dough, if necessary. This will make it easier to transfer the dough to the pizza peel, and then ultimately to the hot pizza stone in the oven.
_______________________
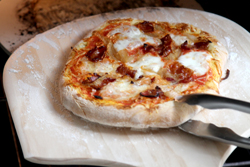
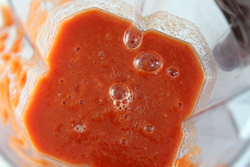
7. Once the dough is formed, it's time to add sauce (see our simple red sauce recipe below) and toppings! Layer on the sauce, and desired toppings. Remember to not overload on toppings if your crust is on the thinner side.
8. After adding the toppings (see below for some of our favorite combos), transfer the pizza to a floured pizza peel for a smooth transition to the hot, preheated pizza stone. Use a large spatula to help guide the pizza onto the peel if needed! Or, if desired, stretch the dough and build the pizza directly on the pizza peel.
9. Bake the pizza for 6-8 minutes (depending on your situation). Enjoy! Then start making your next one, it's a party after all!
________________________
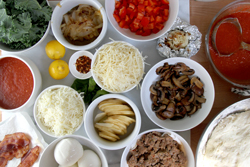
TOPPING IDEAS:
These are a few of our favorite pizza combos, but the best thing about a pizza party is the freedom to choose the toppings! Try prepping an array of toppings. Let guests and kids pick their favorite combos.Remember, when making thin pizzas to choose only 3-5 toppings including sauce and cheese, so that the pizza doesn't become overloaded.
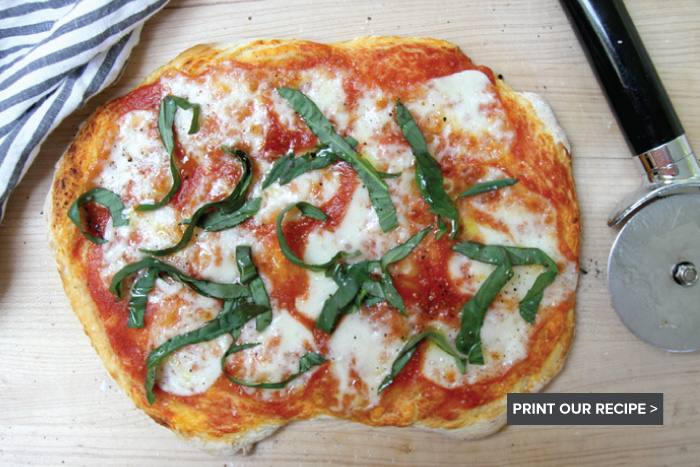
Classic Margherita
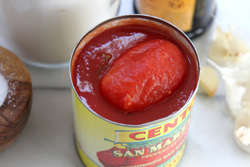
Red sauce (see recipe below)
Thin slices of fresh mozzarella
4-5 leaves of fresh basil, chiffonade
a swirl of olive oil
Spicy Sausage & Mushroom with Red Peppers
Red sauce (see recipe below)
1 cup shredded parmesan cheese
1 cup shredded mozzarella cheese
1/4 lb. hot Italian sausage, cooked and crumbled
6 oz. crimini mushrooms, sliced and sauteed
1/2 red pepper, diced in quarter-inch pieces
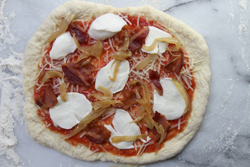
Bacon & Caramelized Onions
Red sauce (see recipe below)
1/2 cup shredded parmesan cheese
5-7 slices of fresh mozzarella
3 slices bacon, fried to crispness, and cut into bite-sized pieces
1/2 large sweet onion, sliced and caramelized
Kale with Lemon Garlic Sauce
Lemon Garlic Sauce (see recipe below)
1 cup shredded parmesan cheese
1 cup shredded mozzarella cheese
3 large kale leaves, washed, stems removed, torn into bite-sized pieces
1 teaspoon crushed red pepper
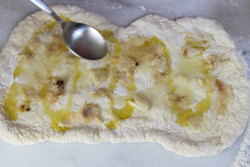
Potato, Rosemary & Parmesan with Lemon Garlic Sauce
Lemon Garlic Sauce (see recipe below)
1 cup shredded parmesan cheese
1 cup shredded mozzarella cheese
1/2 Yukon gold potato, raw, thinly sliced
1 sprig of fresh rosemary, stemmed and cut coarsely
a swirl of olive oil
________________________ |