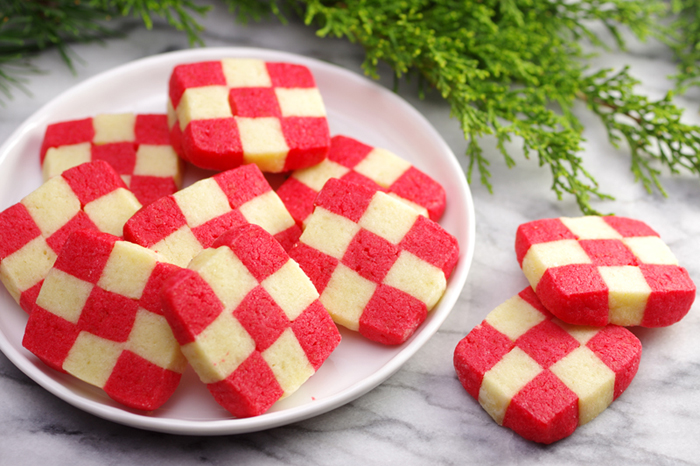
Red & White Checkerboard Cookies
Makes about 5-6 dozen cookies
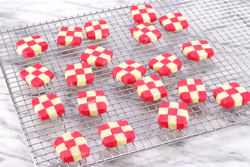
The first reaction these cookies receive is, “how did you do that???” You could spin a good story about painstakingly assembling each cookie by hand, or simply smugly say, “enjoy!” Thanks to super-fast, highly efficient slice-and-bake techniques, you can make dozens of these eye-catching checkerboard cookies and add them to the holiday cookie plate, the office party table, or place under the tree for Santa’s drive-by event.
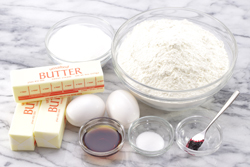
Cookie Ingredients:
4 cups all purpose flour
1 teaspoon table salt
1-1/2 cup unsalted butter (3 sticks), softened to room temperature
3/4 cup granulated white sugar
1 tablespoon pure vanilla extract
2 large egg yolks
Red, gel food coloring
Decorations: (optional)
1 cup powdered sugar
1 tablespoon light corn syrup
1/4 teaspoon pure vanilla extract
1-2 tablespoons whole milk
White nonpareils
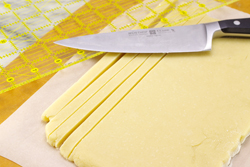
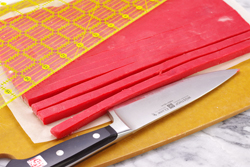
Trim edges and use a ruler… the more precise, the better the checkerboard pattern!
Directions:
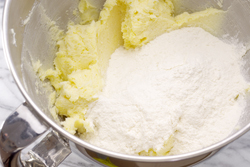
1. Measure the flour and salt, and whisk together in a small bowl until the salt is evenly distributed.
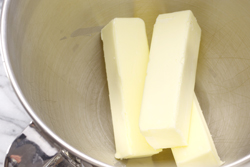
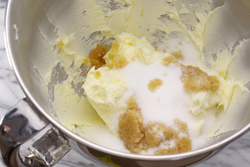
2. In the bowl of a stand mixer, or large mixing bowl, add the butter and beat with the paddle attachment for 30 seconds. Add the sugar and vanilla, and beat until combined, but don’t overbeat. (Unlike many cookies where extra beating incorporates air, we’re looking for a dense cookie in this case.)
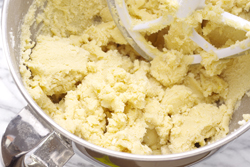
3. Add egg yolks to the butter-sugar mixture, and beat until thoroughly combined. Add the flour and salt, and mix until well-combined, but do not over mix.
4. Remove the dough from the mixing bowl. Divide the dough about in half, but leaving one half slightly larger. (If you’d like to be precise and if you’re into weighing and a little math, the larger “half” should be one-fifth larger. For example, if the entire cookie dough mass weighs 1000 grams, Divide by 9 so that one-ninth of the dough equals 111 grams. Take this number and multiple it by 5. This should be the weight of the larger half, or 555 grams).
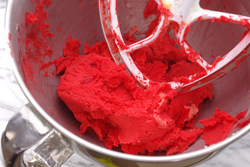
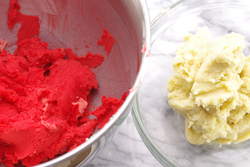
5. Place the larger dough half back in the mixing bowl. Add red food coloring to the dough until a nice deep red is achieved.
6. Form flattened disks, and chill the two dough for 30 minutes so that it’s easier to roll out – stiff, but still pliable.
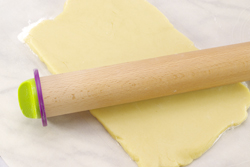
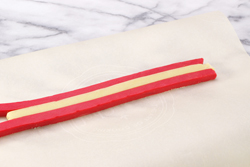
7. Roll out the white dough ball to 3/8-inch thickness (as precise and evenly as possible) in a rectangle-like shape approximately 14 inches long.
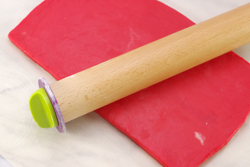
8. Roll out the red dough ball to 3/8-inch thickness (again, as precise and evenly as possible) in a rectangle-like shape approximately 14 inches long.
9. With the rolled out white dough, trim on long side with a ruler to get a straight edge. Cut 3/8" wide strips of dough. Similarly, for the red dough, also cut 3/8” wide lengthwise strips of dough.
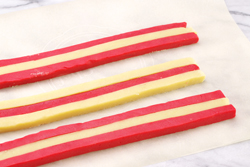
10. Assemble the strips of dough in an alternating fashion using a wet finger lightly applied to the top and side surfaces to help the strips stick together. Specifically, assemble checkerboard pattern in three layers. For the first layer, begin with a red strip, lay a white strip alongside, and a red strip alongside the other side of the white strip. Build the second layer on top of the first layer starting with a white strip, then red, then white. Finally, build the third layer on top of the second layer. Press the assembly together without distorting the square shape.
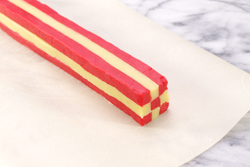
11. Trim the ends of the stacks so that they are straight and perpendicular to the long edge. Wrap the dough log well in plastic wrap and freeze for two hours or up to one month.
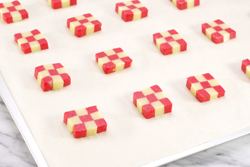
12. When it’s time to bake, remove the log from the freezer. Allow to stand at room temperature for 15 minutes. With a sharp knife on a stable cutting surface, slice 1/4" thick slices. Place on a nonstick, or parchment paper-lined cookie sheet.
13. Bake at 350°F for about 8-10 minutes. (The cookies do not need to brown.) Cool on the cookie sheet for about 2 minutes, then transfer to a cooling rack. Plate or package, and share with others once cooled.
14. Because it’s the holidays, you might opt to embellish these checkerboards with a little icing and a few decorations. Make a simple vanilla glaze by whisking the powdered sugar, corn syrup, vanilla, and one tablespoon of the milk together. Drip in additional drops of milk until the desired consistency reached – about a 7-second ribbon. (What’s a “ribbon” you ask? A “ribbon” when discussing icing, refers to how long it takes when a spoon is dipped into the icing then held above the bowl and the icing ribbons back into the bowl; how long it takes to disappear back into the bowl describes the icing’s thickness. A 5-second icing is thinner than a 7-second icing.) Dip the edge of each baked cookie in the icing, then into the decorations. Place on a cooling rack to allow the icing to dry prior to packaging. |